
 无需注册即可使用")
 隐私与安全选项")


最近看到腾讯云最近轻量应用服务器有活动,对新用户优惠力度比较大,遂花费38RMB买了一年的1核2G 50GB SSD轻量应用服务器练手,用于学习如何搭建WordPress网站。
这份文档将以Ubuntu Server 20.04 LTS 64bit操作系统为例,介绍如何从零开始搭建WordPress。
注: 腾讯云使用 Ubuntu 镜像创建的实例默认禁用 root 用户名通过密码的方式登录实例,可参考腾讯云官方教程启用。
准备工作
- Ubuntu 20.04
- 远程连接工具(Windows系统可用PuTTY;macOS系统直接用系统自带的终端app即可。)
文档默认使用root用户操作。
安装Nginx
执行以下命令安装Nginx:
apt install nginx上述命令执行完毕后,浏览器访问你的服务器公网ip;若显示以下内容则证明安装成功:
Welcome to nginx!

If you see this page, the nginx web server is successfully installed and working. Further configuration is required.

For online documentation and support please refer to nginx.org.
Commercial support is available at nginx.com.

Thank you for using nginx.
注:如果发现访问超时,请确保防火墙80端口已打开。
安装PHP及其扩展
执行以下命令安装PHP及其扩展:
apt install php-fpm php-mysql php-gd php-curl php-dom php-mbstring php-imagick php-zip安装MySQL
1. 执行下面的命令安装 MySQL:
apt install mysql-server2. 安装完成后,接着执行:
mysql_secure_installation如果显示:
Securing the MySQL server deployment.

Enter password for user root:
如果在安装的时候设置过 root的密码,则输入密码后再按 Enter键,否则直接按 Enter键跳过即可。
3. 接着安装程序将会询问是否需要设置验证密码组件:
VALIDATE PASSWORD COMPONENT can be used to test passwords
and improve security. It checks the strength of password
and allows the users to set only those passwords which are
secure enough. Would you like to setup VALIDATE PASSWORD component?

Press y|Y for Yes, any other key for No:
4. 输入 y 然后按下 Enter;随后需要设置密码强度校验政策。这里根据个人的密码强度选择输入对应数字后按回车键即可。随后根据提示设置好root密码。
There are three levels of password validation policy:

LOW    Length >= 8
MEDIUM Length >= 8, numeric, mixed case, and special characters
STRONG Length >= 8, numeric, mixed case, special characters and dictionary                  file

Please enter 0 = LOW, 1 = MEDIUM and 2 = STRONG:
5. 接下来,输入 y 然后按下 Enter,删除匿名用户:
By default, a MySQL installation has an anonymous user,
allowing anyone to log into MySQL without having to have
a user account created for them. This is intended only for
testing, and to make the installation go a bit smoother.
You should remove them before moving into a production
environment.

Remove anonymous users? (Press y|Y for Yes, any other key for No) :
6. 继续输入 y 然后按下 Enter,禁止 root 远程登录:
Normally, root should only be allowed to connect from
'localhost'. This ensures that someone cannot guess at
the root password from the network.

Disallow root login remotely? (Press y|Y for Yes, any other key for No) :
7. 再次输入 y 然后按下 Enter,删除测试数据库:
By default, MySQL comes with a database named 'test' that
anyone can access. This is also intended only for testing,
and should be removed before moving into a production
environment.


Remove test database and access to it? (Press y|Y for Yes, any other key for No) :
8. 输入 y 然后按下 Enter,立即重新加载权限:
Reloading the privilege tables will ensure that all changes
made so far will take effect immediately.

Reload privilege tables now? (Press y|Y for Yes, any other key for No) :
进行到这一步,数据库初始化设置完成。
9. 接下来,输入以下命令进入数据库:
mysql -uroot -p10. 输入前面设置的 root 密码,然后按下 Enter。如果出现如下则证明成功进入数据库:
Welcome to the MySQL monitor.  Commands end with ; or \g.
Your MySQL connection id is 10
Server version: 8.0.23-0ubuntu0.20.04.1 (Ubuntu)

Copyright (c) 2000, 2021, Oracle and/or its affiliates.

Oracle is a registered trademark of Oracle Corporation and/or its
affiliates. Other names may be trademarks of their respective
owners.

Type 'help;' or '\h' for help. Type '\c' to clear the current input statement.

mysql>
11. 接下来,输入下面的命令创建一个名为wordpress的数据库:
CREATE DATABASE IF NOT EXISTS wordpress DEFAULT CHARACTER SET = utf8mb4 DEFAULT COLLATE = utf8mb4_general_ci;看到如下提示,则说明数据库创建成功:
Query OK, 1 row affected (0.12 sec)12. 然后输入下面的命令创建一个数据库用户 wordpress 用来操作上面创建的 wordpress 数据库。你需要修改命令中的 {password} 为你自己的密码。
CREATE USER 'wordpress'@'localhost' IDENTIFIED BY '{password}';13. 接下来,执行下面这条命令,授予用户 wordpress 拥有数据库 wordpress 的所有权限:
GRANT ALL PRIVILEGES ON wordpress.* TO 'wordpress'@'localhost' WITH GRANT OPTION;14. 随后输入下面的命令刷新权限:
FLUSH PRIVILEGES;15. 最后,退出数据库:
exit下载WordPress安装程序
1. 通过以下命令下载最新版的WordPress中文版安装程序到路径 /var/www 中,下载文件命名为 wordpress.tar.gz:
curl https://cn.wordpress.org/latest-zh_CN.tar.gz -o /var/www/wordpress.tar.gz2. 进入 /var/www 文件夹:
cd /var/www3. 解压前面下载的 wordpress.tar.gz 到当前文件夹中:
tar -zxvf wordpress.tar.gz4. 修改文件夹用户组权限:
chown -R www-data:www-data /var/www/wordpress修改Nginx配置文件
接下来,需要修改Nginx配置文件。
1. 首先复制一份默认配置,并将下面命令中的 {domain} 更换为你自己的域名。
cp /etc/nginx/sites-available/default /etc/nginx/sites-available/{domain}.conf2. 接着使用Vim编辑器打开配置文件进行修改:
vi /etc/nginx/sites-available/{domain}.conf注:如果提示 bash: vi: command not found. 则先通过下面的命令安装Vim,安装完成后再执行前面的命令修改配置。
apt install vim3. 执行 vi /etc/nginx/sites-available/{domain}.conf 打开配置文件后,按下键盘的i键进入编辑状态,将配置修改成如下,修改好后按Esc退出编辑状态,最后按下:wq保存修改并关闭配置文件。
server {
  listen 80;
  listen [::]:80;
  root /var/www/wordpress;
  index index.php;
  server_name {you-domain};
  location / {
    try_files $uri $uri/ =404;
  }
  location ~ \.php$ {
    include snippets/fastcgi-php.conf;
    fastcgi_pass unix:/var/run/php/php7.4-fpm.sock;
  }
}
注:如果没有使用域名,则无需修改配置文件内的 server_name 字段。其中配置文件内 fastcgi_pass 这一项中的 php7.4-fpm.sock 对应的是php-fpm版本。
本文安装的是 PHP 7.4,在修改配置时请记得替换成你们安装的版本。如果不确定自己安装的PHP是什么版本,可通过 php -v 命令查看服务器安装的对应PHP版本。
4. 接下来,删除正在使用的默认配置:
rm /etc/nginx/sites-enabled/default5. 然后将修改好的配置加入到正在使用的配置中:
ln -s /etc/nginx/sites-available/{domain}.conf /etc/nginx/sites-enabled/6. 测试配置是否正确:
nginx -t如果出现如下信息则代表配置成功:
nginx: the configuration file /etc/nginx/nginx.conf syntax is ok
nginx: configuration file /etc/nginx/nginx.conf test is successful
7. 重载配置以生效:
nginx -s reload浏览器引导安装WordPress
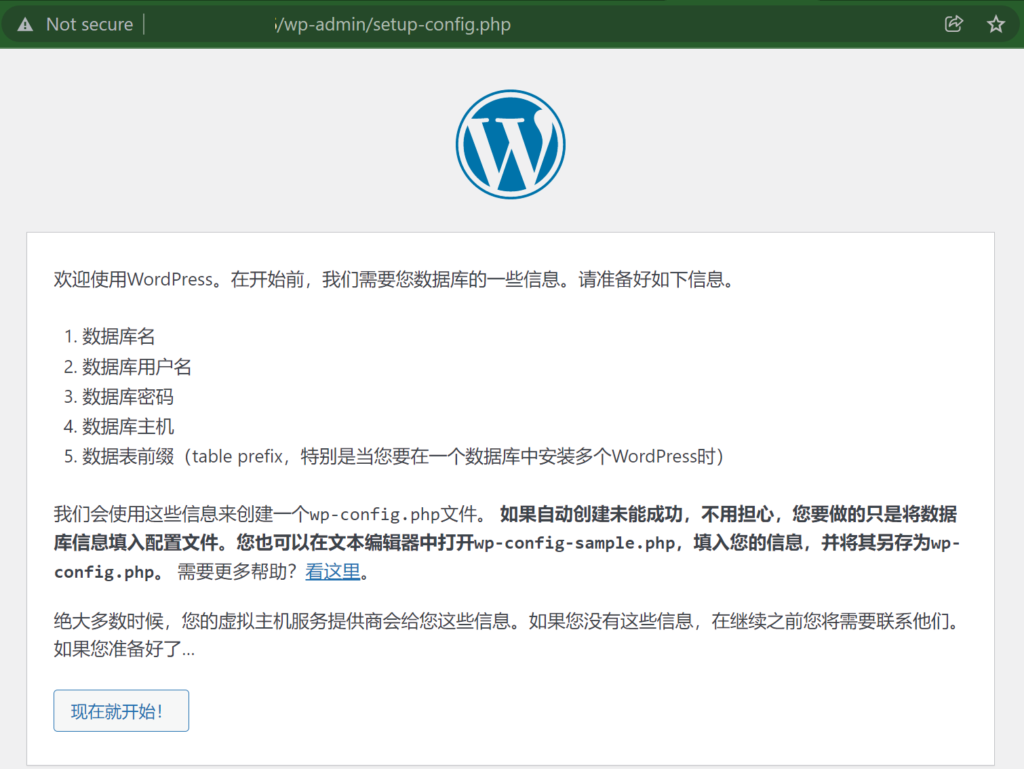
以上所有步骤执行完毕后,回到浏览器访问服务器公网ip,将会看到WordPress欢迎页面。点击“下方现在就开始!”按钮继续。
在下一个界面中,将用户名修改为wordpress,密码一栏填入刚才设置的数据库密码,然后点击提交即可。
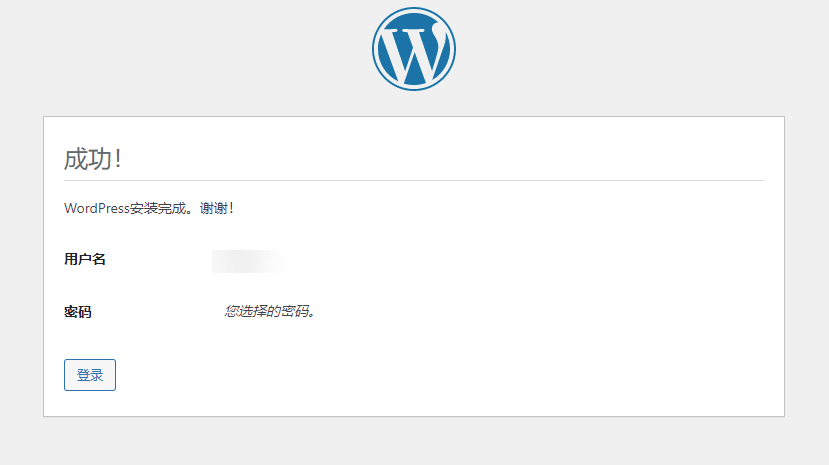
随后,你将会看到WordPress成功安装的页面:
小尾巴~
这份文档并非凭我一己之力完成;在发布此文档前,本人参考了网上许多建站教程,发现对小白用户来说都不是很友好,操作过程中也踩了不少坑。
在此,我想感谢公司帅气又nice的Nico对此教程的细致反馈与审阅。
点击访问Nico的个人博客网站

[教程] GitHub Pages+Gridea搭建静态博客网站
For River, To The Moon —— 《去月球》玩后感


 无需注册即可使用")
 隐私与安全选项")
[…] 在上一篇文章中,我们详细介绍了如何搭建 WordPress 网站。在网站部署好之后,我们需要给网站部署 SSL 证书,开启 HTTPS 加密访问。 […]
建议看看lnmp.org,我在用这个
好的,我有空了解一下😄
[…] Ubuntu20.04+Nginx+PHP 7.4+MySQL搭建WordPress [面向小白] WordPress网站页面加载速度优化教程 WordPress网站部署SSL证书启用HTTPS 本文作者 […]